Several days ago Bren at Pieces From Me tagged me to tell 7 things about myself. She said I was to tag 7 more people. Since I am fairly new to blogging, I've decided to tell you 7 things about me, but I don't really know people well enough to tag them.
Here goes!
1. Ever since I was a little girl, I've wanted to live in the mountains in a log cabin. I did live 6 years in the mountains of Virginia, but I didn't get to live in my log cabin!! I visualize this cabin filled with rustic furniture, quilts, and a wonderful fireplace. I don't know why I like mountains so much, but I do. I grew up 60 miles from the coast of Texas. You would think I would like the beach, but not so....I do not enjoy going to the beach at all. Part of that could be that at age 28 I had skin cancer even though I did not sun bathe, I have medium toned skin, brown hair, and dark brown eyes. I was not the typical candidate for skin cancer.
2. My favorite color is blue. Maybe that is part of the reason that one of my favorite flowers is the Bluebonnet. I love the fields of Bluebonnets that bloom in Texas in the spring.
3. I hate hot, humid weather...and sweating! In the winter I can always put on layers of clothing to make myself comfortable....but in the summer, I can never take off enough to be cool and comfortable without becoming indecent. For the past few years, I have been experiencing what I call "personal summers". Those occur at any time of the year. Those of you who are 50ish will understand the term.
4. I do NOT eat chicken!!!! I grew up on a huge poultry farm in south Texas. I know too much about the product and it turns my stomach. I will prepare chicken for my family because they all love it. They tell me I do a good job cooking it, but I cannot tell you for sure because this is one food I will not even taste to see if the seasoning is just right. And please...don't offer me chicken soup when I'm sick as that is certain to make me throw up! When I prepare chicken for the family, I usually make myself a cheese sandwich. I don't want to know the details about making cheese because I'm sure there is something there to turn my stomach too!!!!
5. Since we are talking about chickens....I once had a pet chicken. I am a child of the 50's and in the area where I lived, the 5 and dime store would get live baby chicks during the Easter season. These chicks were always dyed various pastel colors and sold as pets for children. I got a pink one ...one year. She lost the pink downy fuzz and got rusty red feathers. I had her trained to ride on the handle bars of my bike. Am I weird or what??? Hate chicken, but loved a chicken!
6. My kids think I am weird because I keep buttermilk in the refrigerator all the time. I like to use it when I cook. The reason they think I'm weird is I also like to pour cold buttermilk straight from the carton into a glass and drink it. Mmmm... Nothing like a glass of cold buttermilk! The kids always say in their opinion... it is like drinking sour milk.
7. I love to read. I have always felt that if I could read well, I could learn to do almost anything. I raised my kids telling them that almost everyday. I credit my love of reading to my 4th grade teacher. She encouraged us to read in every way she could and she always told us that "books are your window to the world." Being from a small, farming community...our world was very small and we really needed a window to realize there was more out there for us. I am pretty much a self taught quilter through reading and watching a few programs on TV. I had never taken a quilting class until a year ago when I started an applique class....and this past May, I took a hand quilting class. I also do several other forms of needlework that I have learned from reading instruction books.
7a. I have loved to sew since I made my first dress at age 12 from material that I had bought with my own money. My mother had always sewn everything we wore until that time. I was certain I could sew, but momma wouldn't let me use her electric sewing machine, so my great aunt let me use her old New Home treadle machine to sew that first dress. After momma realized that I really could sew, I was pretty much in charge of sewing all my own clothes. That great aunt has been gone for many years now, but when she passed, she left the old treadle machine to me. The cabinet is in very bad shape, but the machine still works and it sits in my family room covered with a cloth that I crocheted. Someday I will share a picture of it. By the way, my mother still sews on the old Brother sewing machine that she was so reluctant to let me use. It is 50+ years old! She refuses to part with it or to even try a new machine.
Hope these 7+ things reveal a little of the simple, yet complex person that I am! My husband says I can be so confusing sometimes. That's because I'm simply complex!
Monday, July 16, 2007

Friday, July 13, 2007
Ruching....continued.
As promised, here is the continuation of how I form my ruched strips into a flower. The first installment was posted July 9. In the first section, I showed you how I mark and stitch the strip to be gathered. As I work with this strip, the wrong side of the strip will be the side where the two raw edges are folded to meet in the center. Here is a picture of my gathered strip.
Notice how there is about 1/2 inch at the end of the strip that isn't gathered. I fold that portion that was not gathered to the wrong side and tack it down. I try to make sure that my stitches don't show on the right side.


Then I continue working with this end. I want to start forming the strip into a circle so that the little petals touch in the center. I work with the right side of the strip up. I knot my thread and take a tiny stitch where the first two petals touch. This stitch will hold them in place.

Then I curve the strip so another petal touches the first two I stitched together. I continue stitching the petals together until I have a small circle with NO hole in the center. It usually takes about 6 or 7 petals for me to get a nice circle that lays flat. Then I position the strip behind the very first petal to begin the second round of petals. This photo shows the first round of petals and I'm just beginning the second round.

In the second round, I want about half of the petals showing above the tops of the petals in the first round.

I continue tacking each petal in place. I am placing my stitches so that they go down through the top of the first round of petals. If you place the stitch so that it goes down in the gathers, you will not be able to see the stitch from the right side. Remember, I'm using red thread to do the stitching. I continue curling the gathered strip until I have used the entire strip.

You are really forming a spiral when you make this flower. At the end, I just curve the last little bit under and stitch to secure it behind the last round of petals. The backside is not pretty with the big stitches, but that does not matter because it will be hidden from view when you tack the flower onto your background.


When I attach my flower to the background...I place a stitch in each of the outside row of petals. Sometimes I also stitch through some of the inside petals The stitch goes through both the petal and the background. When I do this, I again place the stitches so they are hidden by the gathers. The following picture is one of the blocks that will be in DD's quilt. You can see the 3 ruched flowers in the center.

This next picture shows the back of the block. I think you should be able to click on it and enlarge it so you can see my BIG stitches that attach the ruched flower to the background. It's the burgundy thread. Not pretty is it??? This quilt will most likely hang on a wall and not be washed. If I were attaching the ruching to a quilt that I knew would be washed, I would use a double thread and I would attach it with many little stitches to make sure it did not come off due to a broken thread.

Some people use a foundation to form their flower. I don't like that extra layer of fabric and I have found that I can form and stitch these without it. Also, I have seen some ruching where the spiral was formed by winding each round on top of the round before it. It's just my preference to have each round form behind the others. You will have to play around and see what works for you. Ruching really is fun and you can make some lovely dimensional flowers with it. I hope you will give it a try.
Sorry for the blurry photos. I'm a quilter, not a photographer.

Notice how there is about 1/2 inch at the end of the strip that isn't gathered. I fold that portion that was not gathered to the wrong side and tack it down. I try to make sure that my stitches don't show on the right side.


Then I continue working with this end. I want to start forming the strip into a circle so that the little petals touch in the center. I work with the right side of the strip up. I knot my thread and take a tiny stitch where the first two petals touch. This stitch will hold them in place.

Then I curve the strip so another petal touches the first two I stitched together. I continue stitching the petals together until I have a small circle with NO hole in the center. It usually takes about 6 or 7 petals for me to get a nice circle that lays flat. Then I position the strip behind the very first petal to begin the second round of petals. This photo shows the first round of petals and I'm just beginning the second round.

In the second round, I want about half of the petals showing above the tops of the petals in the first round.

I continue tacking each petal in place. I am placing my stitches so that they go down through the top of the first round of petals. If you place the stitch so that it goes down in the gathers, you will not be able to see the stitch from the right side. Remember, I'm using red thread to do the stitching. I continue curling the gathered strip until I have used the entire strip.

You are really forming a spiral when you make this flower. At the end, I just curve the last little bit under and stitch to secure it behind the last round of petals. The backside is not pretty with the big stitches, but that does not matter because it will be hidden from view when you tack the flower onto your background.


When I attach my flower to the background...I place a stitch in each of the outside row of petals. Sometimes I also stitch through some of the inside petals The stitch goes through both the petal and the background. When I do this, I again place the stitches so they are hidden by the gathers. The following picture is one of the blocks that will be in DD's quilt. You can see the 3 ruched flowers in the center.

This next picture shows the back of the block. I think you should be able to click on it and enlarge it so you can see my BIG stitches that attach the ruched flower to the background. It's the burgundy thread. Not pretty is it??? This quilt will most likely hang on a wall and not be washed. If I were attaching the ruching to a quilt that I knew would be washed, I would use a double thread and I would attach it with many little stitches to make sure it did not come off due to a broken thread.

Some people use a foundation to form their flower. I don't like that extra layer of fabric and I have found that I can form and stitch these without it. Also, I have seen some ruching where the spiral was formed by winding each round on top of the round before it. It's just my preference to have each round form behind the others. You will have to play around and see what works for you. Ruching really is fun and you can make some lovely dimensional flowers with it. I hope you will give it a try.
Sorry for the blurry photos. I'm a quilter, not a photographer.
Tuesday, July 10, 2007
It's a sad day at my house. Look what came today.

I was expecting packers this morning, but not the moving van. Since DD's things were no where near a full load, they did it all by 1pm today. It's very tough going in her room as it is empty...except for the bed. Down the hall, DS's is almost as bad. We sent some of his things on the van with hers as he lives 4 hrs. from her. Reality is setting in that they won't get to come home very often anymore and all those familiar things from their childhood that sat around in their rooms is now gone to live with them. They are about 1100 miles away now. We have always been a close family, so this is difficult for me. Thank goodness for the family cellphone plan!!!

I was expecting packers this morning, but not the moving van. Since DD's things were no where near a full load, they did it all by 1pm today. It's very tough going in her room as it is empty...except for the bed. Down the hall, DS's is almost as bad. We sent some of his things on the van with hers as he lives 4 hrs. from her. Reality is setting in that they won't get to come home very often anymore and all those familiar things from their childhood that sat around in their rooms is now gone to live with them. They are about 1100 miles away now. We have always been a close family, so this is difficult for me. Thank goodness for the family cellphone plan!!!
Monday, July 9, 2007
How I Ruch........
I've promised to show how I do my ruching. I started to gather my thoughts and jot down my steps today. This is going to be much more difficult than I thought. Sometimes I doubt whether my words will convey the proper action that needs to be done. I'm going to give it a try and I did take some pictures. Please understand that I am no expert photographer. I had to take these holding the camera in my right hand and my sewing and tools in my left hand. I am right handed, so this was a real trip. Glad no one was looking in my kitchen window as they would have thought I was crazy!!
OK....here it goes.
1. I cut a strip 1" wide that is the width of the fabric.
2. I press the strip in half matching the cut edges and having the wrong sides together. (Hint: when pressed, the strip should be 1/2" by the width of fabric). In the photo, I have opened the folded strip and you are looking at the wrong side of the fabric.

3. I then open the pressed strip and fold so the 2 cut edges meet right over the fold. Again, I want the right sides out on this and when I press this it will look like single fold bias tape. I'm starting that process here.

Note: Some people like to use a wider strip and then fold it in thirds. I do not do mine that way as I do not like the extra thickness of fabric that you get with that method. You will have to decide what works best for your project.
Now it's time to mark the strip with guidelines for stitching. Things I use are a mechanical pencil and ruler. A sandpaper board will be helpful when drawing the guidelines. If you are only doing a few pieces of ruching, you can mark them using only the ruler and pencil, but there are tools to make the marking easier. Read all the way through this section to see both methods that I have used to mark my strips.
1. I lay the strip on the sandpaper board so that the side with two raw edges meeting in the center...is face up. Then I position the ruler so that the end of the ruler is even with one end of the strip. I put a pencil mark right on the fold of the fabric every 1 inch down the length of the strip.

2. I move the ruler to the other side of the strip and position the ruler so that the 1/2 inch mark on the ruler is now even with the end of the strip. Again put a pencil mark right on the fold of the fabric at the 1 inch mark on the ruler and every inch down the length of the strip.

3. Using the ruler and pencil, I lightly join the dots. Your lines will look like a zigzag down the length of the strip as in this photo.

If you are going to be doing a lot of ruching, there are templates available that make marking the stitching lines very quick and easy. There are several available and you can find them on line. I did buy a marking template because my applique quilt has lots of ruching, and it has made the marking so much easier for me. Mine is from Anita Shackelford, and she sells them on her website. Here's a picture of how I mark mine.
 Now, with my strip all marked, I'm ready to stitch. Normally I would use a thread that matches the fabric, but so you can see it, I'm going to use red thread. I use a double thread because there is nothing more frustrating than having the thread break when you begin to gather the strip. I put a knot in my thread, start at the end, and do small running stitches. I like to make sure one of the stitches is across the area where the two raw edges meet in the center. This helps to control the raw edges when you start to gather. I hope you can see that in the photo as it is a little blurry.
 Then I pull the needle on through, loop the thread over the edge and come up from the underside with the needle. Continue to stitch down the next line with small running stitches. Here's a sample so you get an idea of what the stitching begins to look like.
 I do a few of these zigzags...then I gather them as it is difficult to gather if you sew all of the zigzags at once. Here's one with a little of the gathering done.
 I continue stitching and gathering until I have completely gathered my strip of fabric. I'll work on finishing my stitching tonight and before the end of the week, I will try to show how I form the strip into a flower.
This is just my way of doing my ruching. It is a combination of things I have learned from many different people and books. I took everything I have seen and read and came up with what worked for me. I can't say that it is wrong or right....it's just my way.
Please be patient with me for my next post. Packers are coming tomorrow to pack up the belongings of my 2 kids who have just moved to the east coast to start new jobs after graduating. My posting will be dependent upon how quickly and smoothly that goes. It will be a sad day at my house.
By the way....my title is strange because I just typed it in using bold letters because Blogger would not let me put a title in the title box!
I've promised to show how I do my ruching. I started to gather my thoughts and jot down my steps today. This is going to be much more difficult than I thought. Sometimes I doubt whether my words will convey the proper action that needs to be done. I'm going to give it a try and I did take some pictures. Please understand that I am no expert photographer. I had to take these holding the camera in my right hand and my sewing and tools in my left hand. I am right handed, so this was a real trip. Glad no one was looking in my kitchen window as they would have thought I was crazy!!
OK....here it goes.
1. I cut a strip 1" wide that is the width of the fabric.
2. I press the strip in half matching the cut edges and having the wrong sides together. (Hint: when pressed, the strip should be 1/2" by the width of fabric). In the photo, I have opened the folded strip and you are looking at the wrong side of the fabric.

3. I then open the pressed strip and fold so the 2 cut edges meet right over the fold. Again, I want the right sides out on this and when I press this it will look like single fold bias tape. I'm starting that process here.

Note: Some people like to use a wider strip and then fold it in thirds. I do not do mine that way as I do not like the extra thickness of fabric that you get with that method. You will have to decide what works best for your project.
Now it's time to mark the strip with guidelines for stitching. Things I use are a mechanical pencil and ruler. A sandpaper board will be helpful when drawing the guidelines. If you are only doing a few pieces of ruching, you can mark them using only the ruler and pencil, but there are tools to make the marking easier. Read all the way through this section to see both methods that I have used to mark my strips.
1. I lay the strip on the sandpaper board so that the side with two raw edges meeting in the center...is face up. Then I position the ruler so that the end of the ruler is even with one end of the strip. I put a pencil mark right on the fold of the fabric every 1 inch down the length of the strip.

2. I move the ruler to the other side of the strip and position the ruler so that the 1/2 inch mark on the ruler is now even with the end of the strip. Again put a pencil mark right on the fold of the fabric at the 1 inch mark on the ruler and every inch down the length of the strip.

3. Using the ruler and pencil, I lightly join the dots. Your lines will look like a zigzag down the length of the strip as in this photo.

If you are going to be doing a lot of ruching, there are templates available that make marking the stitching lines very quick and easy. There are several available and you can find them on line. I did buy a marking template because my applique quilt has lots of ruching, and it has made the marking so much easier for me. Mine is from Anita Shackelford, and she sells them on her website. Here's a picture of how I mark mine.
 Now, with my strip all marked, I'm ready to stitch. Normally I would use a thread that matches the fabric, but so you can see it, I'm going to use red thread. I use a double thread because there is nothing more frustrating than having the thread break when you begin to gather the strip. I put a knot in my thread, start at the end, and do small running stitches. I like to make sure one of the stitches is across the area where the two raw edges meet in the center. This helps to control the raw edges when you start to gather. I hope you can see that in the photo as it is a little blurry.
 Then I pull the needle on through, loop the thread over the edge and come up from the underside with the needle. Continue to stitch down the next line with small running stitches. Here's a sample so you get an idea of what the stitching begins to look like.
 I do a few of these zigzags...then I gather them as it is difficult to gather if you sew all of the zigzags at once. Here's one with a little of the gathering done.
 I continue stitching and gathering until I have completely gathered my strip of fabric. I'll work on finishing my stitching tonight and before the end of the week, I will try to show how I form the strip into a flower.
This is just my way of doing my ruching. It is a combination of things I have learned from many different people and books. I took everything I have seen and read and came up with what worked for me. I can't say that it is wrong or right....it's just my way.
Please be patient with me for my next post. Packers are coming tomorrow to pack up the belongings of my 2 kids who have just moved to the east coast to start new jobs after graduating. My posting will be dependent upon how quickly and smoothly that goes. It will be a sad day at my house.
By the way....my title is strange because I just typed it in using bold letters because Blogger would not let me put a title in the title box!
Saturday, July 7, 2007
Hope I will be back to posting more regularly again this next week. Having a husband off from work throws my usual schedule off.
DH had July 5&6 off, and we had no plans. Being empty nesters, we just got in the car and headed north with no real destination in mind. Our first stop was just as we crossed the border into Iowa at a welcome center in Lamoni, IA. Lots of interesting literature made us decide to see a few things in our neighboring state. Of course, quilting is always on my mind!
The first location we decided to check out was Winterset, IA. We saw some of the bridges of Madison County, the house where the actor John Wayne was born,
 and of course....Fons and Porter's Quilt Shop.
 I did a little shopping there. Here's what I bought.
 I'm going to use the top piece for some ruching....which by the way....I am going to try to show how I do my ruching very soon.... as I have promised. The white, green and pink are for a future project.
Then we got back on the road and went north to Des Moines. We got stuck in a traffic jam there....the result of a 6 vehicle accident....so we decided we wanted a more relax country setting. That decision made....we headed east for the Amana Colonies. Amana Colonies is on the National Park Service's National Register of Historic Places. If you are interested in learning about the history of this area, they have a website...http://www.amanacolonies.org/ We stayed in Amana, IA where we could walk to almost everything. There was something there to interest both DH and me. I went with him to a golf driving range early in the morning, then he went with me to a wonderful little quilt and needlwork shop later in the day. Of course, the quilt shop had a few things I needed in my stash! Here's a peek. The blue is for my stash....the orange is for applique flowers.
Since the Amana Colonies were so near Kalona, IA....a large Amish and Mennonite area.....I sweetly asked DH if we couldn't drive home that way. How could he resist a sweet thing like me?? He couldn't... and of course, I found another little quilt shop there. I also found a couple fabrics there that I just had to have for my stash. I also found two quilting stencils that I just had to have. I came very close to buying a set of quilt stencils for marking a whole cloth quilt. I had never seen those before, but in the end I decided they were a little expensive for a project that I wouldn't work on for years...since there are so many projects on my "to do" list already. These are the fabrics I bought in Kalona.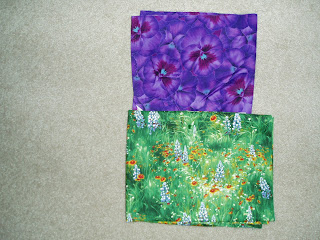 Both are for applique projects already on the "to do" list!
I saw some of the most beautiful flowers I've seen in a long time in Kalona. I snapped a few pics and thought I would share them. Most of these were petunias. Sure wish I knew the secret to growing flowers like this.

 I was careful taking my photos to make sure I did not offend anyone.
Then it was time to head back home. It felt good to get home so I could sleep in my own bed!
DH had July 5&6 off, and we had no plans. Being empty nesters, we just got in the car and headed north with no real destination in mind. Our first stop was just as we crossed the border into Iowa at a welcome center in Lamoni, IA. Lots of interesting literature made us decide to see a few things in our neighboring state. Of course, quilting is always on my mind!
The first location we decided to check out was Winterset, IA. We saw some of the bridges of Madison County,
 the house where the actor John Wayne was born,
 and of course....Fons and Porter's Quilt Shop.
 I did a little shopping there. Here's what I bought.
 I'm going to use the top piece for some ruching....which by the way....I am going to try to show how I do my ruching very soon.... as I have promised. The white, green and pink are for a future project.
Then we got back on the road and went north to Des Moines. We got stuck in a traffic jam there....the result of a 6 vehicle accident....so we decided we wanted a more relax country setting. That decision made....we headed east for the Amana Colonies. Amana Colonies is on the National Park Service's National Register of Historic Places. If you are interested in learning about the history of this area, they have a website...http://www.amanacolonies.org/ We stayed in Amana, IA where we could walk to almost everything. There was something there to interest both DH and me. I went with him to a golf driving range early in the morning, then he went with me to a wonderful little quilt and needlwork shop later in the day. Of course, the quilt shop had a few things I needed in my stash! Here's a peek.
 The blue is for my stash....the orange is for applique flowers.
 Since the Amana Colonies were so near Kalona, IA....a large Amish and Mennonite area.....I sweetly asked DH if we couldn't drive home that way. How could he resist a sweet thing like me?? He couldn't... and of course, I found another little quilt shop there. I also found a couple fabrics there that I just had to have for my stash. I also found two quilting stencils that I just had to have. I came very close to buying a set of quilt stencils for marking a whole cloth quilt. I had never seen those before, but in the end I decided they were a little expensive for a project that I wouldn't work on for years...since there are so many projects on my "to do" list already. These are the fabrics I bought in Kalona.
 Both are for applique projects already on the "to do" list!
I saw some of the most beautiful flowers I've seen in a long time in Kalona. I snapped a few pics and thought I would share them. Most of these were petunias. Sure wish I knew the secret to growing flowers like this.

 I was careful taking my photos to make sure I did not offend anyone.
Then it was time to head back home. It felt good to get home so I could sleep in my own bed!
Wednesday, July 4, 2007
Happy 4th of July!!
I've been busy the last few days. DH has the week off from work and when he is here...my usual schedule goes topsy turvy.
Our neighborhood was ablaze last night with fireworks. I have never lived anywhere that you could buy and pop fireworks within the city. They are legal for 4 days and churches and other organizations use it to make funds. Every place I have lived, they are not allowed except as a show for the public put on by the city. Our neighbors where setting off things that sound like huge bombs. Embers were raining down everywhere. I heard one neighbor tell the other that he had spent over $800 on fireworks! DH and I want to go away for a couple of days, but I will not leave until after the 4th when all this stops. I'm all for an organized show. I love those, but this business of worrying about whether or not your house will burn down is not fun!
I did manage to get a 3 swags sewn on my center medallion. I will try to get a picture of my progress posted soon. I also am going to try to take some pics of how I make my rushing. I have had some people ask about that. It is not hard....but it sure looks as if it is. It may next week before I get this done as we are going to most likely be away from home a few days after tomorrow.
Again, everyone have a happy and safe 4th!!
I've been busy the last few days. DH has the week off from work and when he is here...my usual schedule goes topsy turvy.
Our neighborhood was ablaze last night with fireworks. I have never lived anywhere that you could buy and pop fireworks within the city. They are legal for 4 days and churches and other organizations use it to make funds. Every place I have lived, they are not allowed except as a show for the public put on by the city. Our neighbors where setting off things that sound like huge bombs. Embers were raining down everywhere. I heard one neighbor tell the other that he had spent over $800 on fireworks! DH and I want to go away for a couple of days, but I will not leave until after the 4th when all this stops. I'm all for an organized show. I love those, but this business of worrying about whether or not your house will burn down is not fun!
I did manage to get a 3 swags sewn on my center medallion. I will try to get a picture of my progress posted soon. I also am going to try to take some pics of how I make my rushing. I have had some people ask about that. It is not hard....but it sure looks as if it is. It may next week before I get this done as we are going to most likely be away from home a few days after tomorrow.
Again, everyone have a happy and safe 4th!!
Sunday, July 1, 2007
The blue strips have now become ruched strips! Now to just get them shaped and sewn onto the block.

I also took the paper templates off the center medallion block and got those ironed onto the fabric. I don't know if I will have much time to stitch today. Since DH is home, I don't get as much done as I like to spend time with him. Even after 31+ years...he is still my very bestest friend!

I know you are getting tired of hearing this...but no steps again as we still have rain. At the moment, there are no drops coming down, but the sky looks like it could open up and pour at any moment. At least we don't have the flooding that some areas to the south and west of us have. Ours has been just slow, constant rain. I would love to share with the Tahoe area if I could!

I also took the paper templates off the center medallion block and got those ironed onto the fabric. I don't know if I will have much time to stitch today. Since DH is home, I don't get as much done as I like to spend time with him. Even after 31+ years...he is still my very bestest friend!

I know you are getting tired of hearing this...but no steps again as we still have rain. At the moment, there are no drops coming down, but the sky looks like it could open up and pour at any moment. At least we don't have the flooding that some areas to the south and west of us have. Ours has been just slow, constant rain. I would love to share with the Tahoe area if I could!
Subscribe to:
Posts (Atom)