I like to post pictures of pretty quilt projects that I have completed or that I'm working on, but today I'm posting some pictures that aren't pretty. It warms my heart to see things in this condition though because I know these pillow tops have truly been used and loved as I had intended them to be.
Now for the story behind these uglies. When my children were small, they were always pulling the cushions off the sofa to lay on the floor and watch their favorite tv program(they loved MacGyver because he used his brain and not a gun to get out of trouble). So I got the brilliant idea that I would make them a quilted pillow cover and give it to them as a Christmas gift along with instructions that they were to use those and leave my sofa cushions on the sofa! I would make these so that they could easily be taken off to be washed and the form could be replaced as needed. DS was in 7th grade and DD in 9th when I got this idea. I picked fabrics that I thought they would like and made the pillow tops for and 18 inch square pillow. I never dreamed how successful my idea would be. They loved the pillows and I had no more problem with my sofa cushions. The kids took these with them when we traveled, when they went on school trips, to grandmas house, etc. I am going to share pics of DS's tops as those have seen the most wear and he has brought the old ones home to me.
This was the first one I made for him.
When it got shabby, he came to me and asked if I would make him another. By that time he was in high school. running track, and placing at the state level. He asked if maybe I could do something with the foot that symbolizes track and field events. First I looked for fabric with the emblem and found only baseball, football, and soccer. I looked everywhere for a line drawing and could not find that either....so I drew my own. After all, if my high school son was asking for something I made and quilted for him, I was certainly going to try to please him. I was very pleased with my finished product.
Originally the fabrics in this were different than they appear here. What looks like pink was once a light sky blue. I think that discoloration was due to some medication he used for a while.
This one went on almost every high school bus trip he made to track meets and academic meets.
When this pillow began to get shabby, he was already in college and running track there. This time he said I didn't have to make such a complicated one, so this is what he got.
This one stayed with him through graduate engineering school and is now with him at his new apartment and job in Maryland. I expect that someday soon he will again say, "Mom, my pillow is getting a bit shabby. You think you could make me another one?" And I will again stitch another pillow top for him to love to rags!
Tuesday, July 31, 2007
Monday, July 30, 2007
It seems I'm in a rut lately. The only sewing I managed to do this weekend was some mending that I have been putting off for so long. I absolutely hate doing mending work. I would rather sew a whole new garment than mend one! So, I have no pictures to share of an interesting project or stitchery.
Today is my day to run errands....the grocery store, cleaners, etc. Not chores I consider fun either, but they have to be done.
Since I have no new photos to share, I will share another Botanical block. This is the second one I did and I also did two of this one since I had not chosen my background. I think this one is one of my favorites. The leaves were all cut from one piece of batik except for the dark purple. This is reminds me of the Solomon's Seal that grew in my yard in Virginia. The designer called this one St. Andrew's Cross. My color choices would not be accurate for either plant. My color choices for all of these have just been whatever I felt like using and not for botanical accuracy. Again, I stitched the one on yellow background first, then the one on batik.
Saturday, July 28, 2007
Darlene over at Quilting Daze asked us to answer 5 questions....so here's my answers to her questions.
1. Do you do regular TLC maintenance on your sewing machine? Yes. Each time I remove a bobbin, I have a little brush that I use to clean out the lint. About every 2 bobbins, I pop the cover off the feed dogs and clean any lint buildup there since there are areas I can't get when I clean around the bobbin. Then about every 8 hrs. of sewing time, I do a very thorough cleaning and oiling. When I bought my Bernina way back in 1986, I took guide classes. They gave us good instruction on maintenance, and they said to oil after approx. 8 hrs. of sewing and to use the oil very sparingly as too much oil does more harm than not enough. I also take the machine in for professional cleaning and adjustments. I try to treat my machine well as it brings me hours and hours of pure pleasure!!!
2. Do you clean out your pincushion? As I sew, if I find a pin that seems dull, I immediately throw it away. I don't just throw it in the little garbage can by my sewing....I take it down and put it in a safe container with my diabetic needles so the garbage collector won't accidentally get stuck. I also have pins that I use for quilt piecing, short pins I use for applique, and pins that I use for garment sewing and they each are on separate pincushions. I do like pins that are very fine and sharp. I have had some of mine since the 1990's and they still seem sharp....so I continue to use them. And....No Darlene, I wouldn't roll my eyes at you because you clean out your pincushion!
3. What habits do you have with regards to making sure you have piecing thread on hand? I buy several spools at a time so I don't run out.
4. What kind of thread do you use for machine piecing and why? Colors? I use cotton thread for my machine piecing! I usually buy Gutterman Cotton when the local JoAnn's runs it on sale, but I will also use Coat's and Clarks Cotton if that's what I can find in the color I want. I have bought some of the more expensive threads but I can't tell much difference in the quality of the stitch on my 930. I also could not tell much difference in the amount of lint in the bobbin area, so I continue to buy mostly Gutterman. I do NOT use cotton wrapped polyester in quilt piecing. It will cut your fabric. How do I know??? I used it on the one of the first quilts I pieced because I didn't know it is best to match fibers...and that quilt is developing tears right alongside the stitching just like many of the articles in quilt magazines have described.
I usually buy off-white, beige, gray, black, and red. I do occasionally buy a specific color if I feel a project needs a thread match and not just a blend.
5. My DH wants to know if you hide treasures from your DH? I don't hide treasures from DH. He's a wonderful guy and supports my habit with encouragement. He knows I'm frugal and won't blow the budget. I grew up in a house without a lot of money and when I feel I'm spending too much....I ask myself "Do you want that or do you need that????" Thinking about those two words usually curbs my urge to spend too much on quilty things.
Thursday, July 26, 2007
It's going to be a hot day again at my house...and the grass needs mowing. In addition to being a "domestic goddess", I'm also the lawn service! I plan to get out early this morning and get those lawn duties taken care of....then place my fluffy backside in a chair with a glass of ice tea and some stitching for the rest of the day.
Since I don't have anything new stitched to share, I will show you another of my botanical blocks. This is the very first block I stitched in this series. The reason there are two of them with different backgrounds is because I couldn't decide what I wanted when I first started the class. I knew I wanted something yellow, so I did it on a solid yellow until I selected my final background. That took me almost 3 months to decide. I then went back and stitched the flower again on the batik background I selected. I tried to get the flower as close to the one on the solid yellow as I could. I will make the solid yellow into a wall hanging or a pillow top. This block is "Pinks".
Wednesday, July 25, 2007
Today was my weekly Wed. sewing group. I was really excited about going today as I have had several nights at home alone because DH has had to go out to dinner with business associates from out of town. It is so much fun to get together with a room full of ladies who share my love of quilting....and talking! We always have show and tell. There's always something pretty to see during that time. One lady showed a beautiful queen sized whole cloth quilt today...and it was hand quilted. Makes me want to try one of those.....but the "To Do" list is already so long that I will never get it all done during this lifetime!!
I'm still working on the center medallion for DD's quilt. I didn't sew on it the past couple of nights because I wasn't in the mood. When I'm like that, I don't force myself because I know that I would mess something up and I really don't want to do that on this quilt. If I'm not in the mood, I just don't touch it!
Monday, July 23, 2007
My Sewing Nest
Last week Darlene at Quilting Daze showed us her sewing chest and asked us to share a picture of our "nest" where we sew. Mine is nothing special. It's just a rocker/ recliner in my family room. I love this chair! I fell in love with the fabric because it is garden themed and I enjoy working with plants. It is also a very comfortable and soothing chair as it rocks like a glider rocker and it reclines when I'm tired. It also isn't real large and fits me very well. I'm 5 ft. 4 inches tall and my legs are short, so many of the large chairs just feel a bit uncomfortable if my feet don't touch the floor when I sit down. Most of my hand stitching is done as I sit in this chair. DH and I sit here to watch TV or talk in the evenings. My sewing machine is upstairs in one of the bedrooms that I use as my sewing/computer room.
The little cabinet to the right of the chair holds some books, magazines and projects that I'm working on...out of sight so it is a little less messy. However, the top of the cabinet remains a mess most of the time as it is now. You can see that it not only has my sewing stuff, but it also catches a lot of DH's junk! I can see a book and a golf score card there now. On my end of the cabinet top you can see my birdhouse pincushion and also a wool pincushion that found its way down from my sewing room. Of course, I have my OttLight by my chair which I use a lot at night. I got it new... for a bargain at a local clearance store. The little green footstool is always beside my chair. It usually holds the pieces and sewing tools for whatever I am working on. The mess on it now is the makings of a Cathedral Window Quilt that I have worked on for a long while. This was a project I started years ago as a "take along" project. I am using scraps for the little windows and I only pick it up when I have nothing else ready to stitch. I was preparing some of the little muslin blocks for that last night as I watched the Tour de France. Today I plan to get some more of DD applique quilt ready for stitching and will again put the Cathedral Windows back in their little box.
I have not cleaned up behind the chair in a while. The blue bag holds my portable quilting hoop that I used in the hand quilting class I took recently. That needs to go back to the closet in the sewing room!! I also keep a basket behind my chair with a few quilting magazines and quilting books. Usually the ones in the basket are ones I recently purchased. I do try to clean it out regularly so it doesn't get messy and overflow onto the floor.
You can also see the throw draped over my chair. It is sewing themed. I got it as a gift....perfect for someone who sews...don't you think! I also crochet and made the doily on the back of the chair. This area truly is a nest for me. Lots of things that bring me comfort surround me here! Now you've seen my nest.....and like Darlene.....I would like to see yours.
Friday, July 20, 2007
Applique Now....and Then
Applique class was fun yesterday. Everyone has been coming for a while, so we all got a fair amount of stitching done. This class is taught by Dinah Jeffries of Garden City Gateworks (http://www.gardencitygateworks.com/) She is a wonderful lady, and she does such lovely applique. In class, I worked on her Botanical Tiles. It is a series of little flowers that she uses in her classes, but does not market the patterns at this time. She has a lot of other lovely designs that she sells. If you are interested, she has a gallery on her website and you can see some of her work. I guess I should state that I do not work for her.....I'm just a very satisfied customer and an appreciative student! My applique has greatly improved since I began class with her. Little tips and tricks have made a big difference for me in my work. The following pictures are my interpretations of 2 of her patterns. I will post more pics of blocks I have completed with these flowers at a later time on my blog. I think there are 26 of these blocks. I only work on them in class at this time because I'm trying to finish my other applique project. These blocks are about 12 1/2 inches square. This is the block I was working on in class yesterday.
I am in the process of stitching down the large flower. Then I have leaves to add.
Above is my version of her iris.
I showed you my batiks stash in an earlier post and told you that these flowers were the first time I had begun to work with batiks. This type of applique and these patterns were very much outside my usual comfort zone. Here's examples of what I had been doing with applique in the years before I started taking classes. These next three are blocks I made sometime between 1993 and 95.
I drew this leaf pattern from the leaf of a red oak that grew in my front yard when we lived in Texas.This pansy block came from the booklet pictured at the right. I have had this booklet for a very long time. I believe my mother even had this one when I was still living at home before I married.....and I've been married 31+yrs. It was printed by Colonial Patterns Inc. Kansas City MO, but has no printing date (who knew I would one day be living in the KC metro area!!!) My booklet still has the price sticker of $1.75 and that price sticker has a date of Apr 1990 on it.
The above block pattern came from some old magazines that my MIL gave me. It was called Women's Household and the date the pattern appeared was July 1976. The designer was Ruby Hinson Duncan. I love this one!! At the time I made it, there were none of the beautiful 30's reproduction fabrics available. I think this would be lovely made in some of those....I'm going to make a note on my "to do" list to give that a try!! Like I really need something else on that "to do" list!!!!!!!!!!!!!!
As you can see from those 3 photos, I used fairly simple shapes, large pieces, and calico and solid fabrics on muslin. To give you an idea of size, those blocks are 12 1/2 inches square. And.....these are still UFO's!!!!!!!!!!!!
In 1996, I had just moved to the mountains of southwest Virginia. For my birthday, I treated myself to a trip to a fabric store about 30 miles from my home in the Blue Ridge Mountains and I bought fabrics for a wall hanging for my living room. You guessed it....it's still a UFO. I'm oh so close to finished and why I don't just complete it, I cannot explain. I should finish it as I still have the sofa and chairs and it will look fine hanging in the living room.
This was a pattern from the Spring 1996 issue of Patchwork & Quilting Ideas. The pattern was called Irresistible Iris. It is not clear in the article who the designer was. Mine is like one made by Deborah Moffet-Hall.
I started this quilt late in 1996. I cannot find my pattern for this one, but I know it was in an old issue of either Quiltmaker or Quilter's Newletter magazine. My setting is different than the setting in the magazine. I only used their applique motifs. When I made this quilt, I originally was going to leave every other block blank and do some nice quilting in the blank blocks. When I got it sewn together, I did not like the blank blocks, so went back and put applique in those too. I was much happier with top. Please notice....it is still a flimsey!!!! Another UFO! I do have the backing for this one ready...and the batting is bought....and I am planning to start quilting this one after I finish the 2 for my kids.
My applique continued to be fairly simple shapes from the time I finished the tulip quilt top until I started the Conway Album Quilt for DD. The CAQ is my first attempt at dimensional work. Soon after I started that quilt, I started taking the classes with Dinah. She has really helped me with my stitches and my dimensional work.
Now....if she or someone can just help me with getting myself to work on those UFO's!!!!!!!
I hope my little trip through some of my early applique isn't too boring. It is something that I truly enjoy. Thanks for visiting!!
Wednesday, July 18, 2007
Not much stitching happening here today. I had to skip my usual Wednesday sewing group because I had a doctor appointment this morning and some errands to run. Not a day I wanted to spend much time outside as it is so hot again. My flowers will definitely want a nice drink of cool water this evening late. Hot days like this means watering twice a day. The dry, hot southwest wind is blowing too, so that even zaps more of the moisture from the plants.
Since I had to miss sewing group, I'm excited as tomorrow is my monthly applique group/class. I go to a LQS and sew in a classroom setting lead by a lady who designs and sells patterns. I have been going to this class for over a year now, so I'm not really learning new techniques anymore....just going to stitch and for the companionship of others who enjoy applique as I do. I haven't been able to go to this since April, so I'm really looking forward to it. I plan to talk this lady to ask her permission before I post pictures on my blog. I'll share some of what I do in class if she has no problem with it. I am very much a person who enjoys working with the traditional, older patterns in piecing quilts. This applique was really stepping outside of my usual comfort zone. It was my first time to work with batiks. When I started....I had 2 pieces of batiks that amounted to less than a fat quarter. Now my batik stash has grown to this!
Those drawers are filled with fat quarters or quarter yard cuts .... and as you can see, I need another 3 drawer cart. The drawers are stuffed so there was no way to get the pieces on top into the drawers. I accumulated this by buying a fat quarter here and there and never more than 5 at a time. The project I have been working on requires only small pieces of the batiks. That's why I only buy 1/4 yd. or fat quarters. When I'm in a picture taking mood, I'll try to open the drawers and get pictures of the colors. There are lots of them!
Tuesday, July 17, 2007
I have been working on the center medallion for DD's quilt. The swags are now all sewn on. Today I am planning to sew on 4 ruched flowers. I had them pinned on in an earlier photo that I posted of this block, but today they will become permanently stitched on! If I have a good day, I will begin to add the other flowers out on the swags. Here's a progress photo.
I had so many thoughts of good things to write about before the ordeal of movers. Now my brain doesn't want to think or work so I guess I will just give it the vacation it desires. I hope there are others who have times like that. Maybe it is summer that is making me that way. I just move slow when it is hot.
In a usual summer, we have already had lots of days with very hot temps, but we have only had a few days above 90F. Today we are to be 95F and be humid. A good day to make sure I stay around air conditioning. Guess I shouldn't complain at all because Darlene in AZ has really been hot. I'm already looking forward to fall. That's my favorite time of the year.
Monday, July 16, 2007
7 things about me.
Several days ago Bren at Pieces From Me tagged me to tell 7 things about myself. She said I was to tag 7 more people. Since I am fairly new to blogging, I've decided to tell you 7 things about me, but I don't really know people well enough to tag them.
Here goes!
1. Ever since I was a little girl, I've wanted to live in the mountains in a log cabin. I did live 6 years in the mountains of Virginia, but I didn't get to live in my log cabin!! I visualize this cabin filled with rustic furniture, quilts, and a wonderful fireplace. I don't know why I like mountains so much, but I do. I grew up 60 miles from the coast of Texas. You would think I would like the beach, but not so....I do not enjoy going to the beach at all. Part of that could be that at age 28 I had skin cancer even though I did not sun bathe, I have medium toned skin, brown hair, and dark brown eyes. I was not the typical candidate for skin cancer.
2. My favorite color is blue. Maybe that is part of the reason that one of my favorite flowers is the Bluebonnet. I love the fields of Bluebonnets that bloom in Texas in the spring.
3. I hate hot, humid weather...and sweating! In the winter I can always put on layers of clothing to make myself comfortable....but in the summer, I can never take off enough to be cool and comfortable without becoming indecent. For the past few years, I have been experiencing what I call "personal summers". Those occur at any time of the year. Those of you who are 50ish will understand the term.
4. I do NOT eat chicken!!!! I grew up on a huge poultry farm in south Texas. I know too much about the product and it turns my stomach. I will prepare chicken for my family because they all love it. They tell me I do a good job cooking it, but I cannot tell you for sure because this is one food I will not even taste to see if the seasoning is just right. And please...don't offer me chicken soup when I'm sick as that is certain to make me throw up! When I prepare chicken for the family, I usually make myself a cheese sandwich. I don't want to know the details about making cheese because I'm sure there is something there to turn my stomach too!!!!
5. Since we are talking about chickens....I once had a pet chicken. I am a child of the 50's and in the area where I lived, the 5 and dime store would get live baby chicks during the Easter season. These chicks were always dyed various pastel colors and sold as pets for children. I got a pink one ...one year. She lost the pink downy fuzz and got rusty red feathers. I had her trained to ride on the handle bars of my bike. Am I weird or what??? Hate chicken, but loved a chicken!
6. My kids think I am weird because I keep buttermilk in the refrigerator all the time. I like to use it when I cook. The reason they think I'm weird is I also like to pour cold buttermilk straight from the carton into a glass and drink it. Mmmm... Nothing like a glass of cold buttermilk! The kids always say in their opinion... it is like drinking sour milk.
7. I love to read. I have always felt that if I could read well, I could learn to do almost anything. I raised my kids telling them that almost everyday. I credit my love of reading to my 4th grade teacher. She encouraged us to read in every way she could and she always told us that "books are your window to the world." Being from a small, farming community...our world was very small and we really needed a window to realize there was more out there for us. I am pretty much a self taught quilter through reading and watching a few programs on TV. I had never taken a quilting class until a year ago when I started an applique class....and this past May, I took a hand quilting class. I also do several other forms of needlework that I have learned from reading instruction books.
7a. I have loved to sew since I made my first dress at age 12 from material that I had bought with my own money. My mother had always sewn everything we wore until that time. I was certain I could sew, but momma wouldn't let me use her electric sewing machine, so my great aunt let me use her old New Home treadle machine to sew that first dress. After momma realized that I really could sew, I was pretty much in charge of sewing all my own clothes. That great aunt has been gone for many years now, but when she passed, she left the old treadle machine to me. The cabinet is in very bad shape, but the machine still works and it sits in my family room covered with a cloth that I crocheted. Someday I will share a picture of it. By the way, my mother still sews on the old Brother sewing machine that she was so reluctant to let me use. It is 50+ years old! She refuses to part with it or to even try a new machine.
Hope these 7+ things reveal a little of the simple, yet complex person that I am! My husband says I can be so confusing sometimes. That's because I'm simply complex!
Friday, July 13, 2007
Ruching....continued.
As promised, here is the continuation of how I form my ruched strips into a flower. The first installment was posted July 9. In the first section, I showed you how I mark and stitch the strip to be gathered. As I work with this strip, the wrong side of the strip will be the side where the two raw edges are folded to meet in the center. Here is a picture of my gathered strip.
Notice how there is about 1/2 inch at the end of the strip that isn't gathered. I fold that portion that was not gathered to the wrong side and tack it down. I try to make sure that my stitches don't show on the right side.
Then I continue working with this end. I want to start forming the strip into a circle so that the little petals touch in the center. I work with the right side of the strip up. I knot my thread and take a tiny stitch where the first two petals touch. This stitch will hold them in place.
Then I curve the strip so another petal touches the first two I stitched together. I continue stitching the petals together until I have a small circle with NO hole in the center. It usually takes about 6 or 7 petals for me to get a nice circle that lays flat. Then I position the strip behind the very first petal to begin the second round of petals. This photo shows the first round of petals and I'm just beginning the second round.
In the second round, I want about half of the petals showing above the tops of the petals in the first round.
I continue tacking each petal in place. I am placing my stitches so that they go down through the top of the first round of petals. If you place the stitch so that it goes down in the gathers, you will not be able to see the stitch from the right side. Remember, I'm using red thread to do the stitching. I continue curling the gathered strip until I have used the entire strip.
You are really forming a spiral when you make this flower. At the end, I just curve the last little bit under and stitch to secure it behind the last round of petals. The backside is not pretty with the big stitches, but that does not matter because it will be hidden from view when you tack the flower onto your background.
When I attach my flower to the background...I place a stitch in each of the outside row of petals. Sometimes I also stitch through some of the inside petals The stitch goes through both the petal and the background. When I do this, I again place the stitches so they are hidden by the gathers. The following picture is one of the blocks that will be in DD's quilt. You can see the 3 ruched flowers in the center.
This next picture shows the back of the block. I think you should be able to click on it and enlarge it so you can see my BIG stitches that attach the ruched flower to the background. It's the burgundy thread. Not pretty is it??? This quilt will most likely hang on a wall and not be washed. If I were attaching the ruching to a quilt that I knew would be washed, I would use a double thread and I would attach it with many little stitches to make sure it did not come off due to a broken thread.
Some people use a foundation to form their flower. I don't like that extra layer of fabric and I have found that I can form and stitch these without it. Also, I have seen some ruching where the spiral was formed by winding each round on top of the round before it. It's just my preference to have each round form behind the others. You will have to play around and see what works for you. Ruching really is fun and you can make some lovely dimensional flowers with it. I hope you will give it a try.
Sorry for the blurry photos. I'm a quilter, not a photographer.
Tuesday, July 10, 2007
It's a sad day at my house. Look what came today.
I was expecting packers this morning, but not the moving van. Since DD's things were no where near a full load, they did it all by 1pm today. It's very tough going in her room as it is empty...except for the bed. Down the hall, DS's is almost as bad. We sent some of his things on the van with hers as he lives 4 hrs. from her. Reality is setting in that they won't get to come home very often anymore and all those familiar things from their childhood that sat around in their rooms is now gone to live with them. They are about 1100 miles away now. We have always been a close family, so this is difficult for me. Thank goodness for the family cellphone plan!!!
Monday, July 9, 2007
How I Ruch........
I've promised to show how I do my ruching. I started to gather my thoughts and jot down my steps today. This is going to be much more difficult than I thought. Sometimes I doubt whether my words will convey the proper action that needs to be done. I'm going to give it a try and I did take some pictures. Please understand that I am no expert photographer. I had to take these holding the camera in my right hand and my sewing and tools in my left hand. I am right handed, so this was a real trip. Glad no one was looking in my kitchen window as they would have thought I was crazy!!
OK....here it goes.
1. I cut a strip 1" wide that is the width of the fabric.
2. I press the strip in half matching the cut edges and having the wrong sides together. (Hint: when pressed, the strip should be 1/2" by the width of fabric). In the photo, I have opened the folded strip and you are looking at the wrong side of the fabric.
3. I then open the pressed strip and fold so the 2 cut edges meet right over the fold. Again, I want the right sides out on this and when I press this it will look like single fold bias tape. I'm starting that process here.
Note: Some people like to use a wider strip and then fold it in thirds. I do not do mine that way as I do not like the extra thickness of fabric that you get with that method. You will have to decide what works best for your project.
Now it's time to mark the strip with guidelines for stitching. Things I use are a mechanical pencil and ruler. A sandpaper board will be helpful when drawing the guidelines. If you are only doing a few pieces of ruching, you can mark them using only the ruler and pencil, but there are tools to make the marking easier. Read all the way through this section to see both methods that I have used to mark my strips.
1. I lay the strip on the sandpaper board so that the side with two raw edges meeting in the center...is face up. Then I position the ruler so that the end of the ruler is even with one end of the strip. I put a pencil mark right on the fold of the fabric every 1 inch down the length of the strip.
2. I move the ruler to the other side of the strip and position the ruler so that the 1/2 inch mark on the ruler is now even with the end of the strip. Again put a pencil mark right on the fold of the fabric at the 1 inch mark on the ruler and every inch down the length of the strip.
3. Using the ruler and pencil, I lightly join the dots. Your lines will look like a zigzag down the length of the strip as in this photo.
If you are going to be doing a lot of ruching, there are templates available that make marking the stitching lines very quick and easy. There are several available and you can find them on line. I did buy a marking template because my applique quilt has lots of ruching, and it has made the marking so much easier for me. Mine is from Anita Shackelford, and she sells them on her website. Here's a picture of how I mark mine.
Now, with my strip all marked, I'm ready to stitch. Normally I would use a thread that matches the fabric, but so you can see it, I'm going to use red thread. I use a double thread because there is nothing more frustrating than having the thread break when you begin to gather the strip. I put a knot in my thread, start at the end, and do small running stitches. I like to make sure one of the stitches is across the area where the two raw edges meet in the center. This helps to control the raw edges when you start to gather. I hope you can see that in the photo as it is a little blurry.
Then I pull the needle on through, loop the thread over the edge and come up from the underside with the needle. Continue to stitch down the next line with small running stitches. Here's a sample so you get an idea of what the stitching begins to look like.
I do a few of these zigzags...then I gather them as it is difficult to gather if you sew all of the zigzags at once. Here's one with a little of the gathering done.
I continue stitching and gathering until I have completely gathered my strip of fabric. I'll work on finishing my stitching tonight and before the end of the week, I will try to show how I form the strip into a flower.
This is just my way of doing my ruching. It is a combination of things I have learned from many different people and books. I took everything I have seen and read and came up with what worked for me. I can't say that it is wrong or right....it's just my way.
Please be patient with me for my next post. Packers are coming tomorrow to pack up the belongings of my 2 kids who have just moved to the east coast to start new jobs after graduating. My posting will be dependent upon how quickly and smoothly that goes. It will be a sad day at my house.
By the way....my title is strange because I just typed it in using bold letters because Blogger would not let me put a title in the title box!
Saturday, July 7, 2007
Hope I will be back to posting more regularly again this next week. Having a husband off from work throws my usual schedule off.
DH had July 5&6 off, and we had no plans. Being empty nesters, we just got in the car and headed north with no real destination in mind. Our first stop was just as we crossed the border into Iowa at a welcome center in Lamoni, IA. Lots of interesting literature made us decide to see a few things in our neighboring state. Of course, quilting is always on my mind!
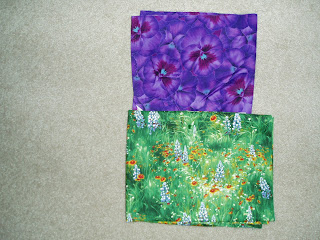
The first location we decided to check out was Winterset, IA. We saw some of the bridges of Madison County, the house where the actor John Wayne was born, and of course....Fons and Porter's Quilt Shop. I did a little shopping there. Here's what I bought.I'm going to use the top piece for some ruching....which by the way....I am going to try to show how I do my ruching very soon.... as I have promised. The white, green and pink are for a future project.
Then we got back on the road and went north to Des Moines. We got stuck in a traffic jam there....the result of a 6 vehicle accident....so we decided we wanted a more relax country setting. That decision made....we headed east for the Amana Colonies. Amana Colonies is on the National Park Service's National Register of Historic Places. If you are interested in learning about the history of this area, they have a website...http://www.amanacolonies.org/ We stayed in Amana, IA where we could walk to almost everything. There was something there to interest both DH and me. I went with him to a golf driving range early in the morning, then he went with me to a wonderful little quilt and needlwork shop later in the day. Of course, the quilt shop had a few things I needed in my stash! Here's a peek.The blue is for my stash....the orange is for applique flowers.
Since the Amana Colonies were so near Kalona, IA....a large Amish and Mennonite area.....I sweetly asked DH if we couldn't drive home that way. How could he resist a sweet thing like me?? He couldn't... and of course, I found another little quilt shop there. I also found a couple fabrics there that I just had to have for my stash. I also found two quilting stencils that I just had to have. I came very close to buying a set of quilt stencils for marking a whole cloth quilt. I had never seen those before, but in the end I decided they were a little expensive for a project that I wouldn't work on for years...since there are so many projects on my "to do" list already. These are the fabrics I bought in Kalona.Both are for applique projects already on the "to do" list!
I saw some of the most beautiful flowers I've seen in a long time in Kalona. I snapped a few pics and thought I would share them. Most of these were petunias. Sure wish I knew the secret to growing flowers like this.
I was careful taking my photos to make sure I did not offend anyone.
Then it was time to head back home. It felt good to get home so I could sleep in my own bed!
Subscribe to:
Posts (Atom)